iPinit   

Thursday, September 18, 2014

Best Decals/Stickers EVER!!!

I am just your average mom blogger. I am not looking to make money from my blog. I just do it when I can. I recently received an amazing offer from kidecals.com.


Being a mom of two boys that play baseball, these decals/stickers came in very handy. I labeled my oldest son"s bags, gloves, and bats......YES he has more than one of each! We play year round for a select baseball academy in our area. I placed one on his bag, one on his glove and one on his bat.  We are two weeks in now and the stickers are still on.
SEE.......

I was also interested in seeing how these labels held up with "mommy" items......Like my plastic wine glasses from GiVino.
Me and my friends love these glasses, however, we haven't found a way to personalize them.
thanks to KidCals.com, I believe we have a solution.
I placed a Kidcal on one of these glasses for an experiment. this is the picture before:
They say that the labels are waterproof......
This is the same glass after washing in the dishwasher on the top shelf on high heat.
There was a little bubble on the edge(but you can't see it), however I contribute that to the curve of the glass and not the product itself. So far, the labels are great. They have held up through baseball four days a week and wine just as many times.

I put these labels on my son's backpack for school and all of his baseball equipment.


I would absolutely recommend KidCals for labeling ALL of your personal items. Baseball is an everyday thing for us and if these labels can stand up to that then they have my approval.

These labels/Decals are great. You can personalize your own at http://kidecals.com.

Happy Labeling

Ciao For Now 
Kris

Wednesday, July 23, 2014

OK I AM MAD....(as in Crazy)

So I was on my way into town yesterday for an appointment. Town for us is about 17 miles (for now).  I came to an intersection and on the right is a vacant lot. Many times you will see truckers parked there. I'm assuming it is some sort of unofficial rest stop. Anyway.....I noticed that there is one of those "Recycling Dump Boxes" in the far corner. And what do you think was sitting there beside the box?????? A Chair! A vintage wood dining chair!


The wood was in tact. The seat had three cigarette burns in it and numerous stains........but hey replaceable. I could not believe it! Why would someone throw this out?

So let's back up a couple of weeks............I have two vintage dining chairs in my "STASH." I had wonderful ideas for them. So I began the makeover faze. Well when I went to pick the fabric to recover them with I found three that I loved. YES three. I could not pass them up so I purchased all three fabric patterns. My dilemma???? I only had two chairs!

GOD is good I tell you. I asked "please let me find another chair so I do not have to choose which fabric to NOT use."  Now I have have my third chair.

Stay tuned for this freebie transformation.

Thanks for looking.

Ciao for now!


Tuesday, July 22, 2014

Rusty Plant Stand Makeover

So after swooning over all of those wonderful finds, I decided to start with something easy. This piece seemed to be calling my name from the moment I pulled it out of that dusty old storage building.

It is a LARGE two tier plant stand that folds for easy storage. There were a couple rusty spots with flaky paint. I used a wire brush and scraper and removed all of those chippy pieces. I decided that this piece would look amazing in a Turquoise color.  I chose Restoleum 2X Ultra Cover in Seaside. I love this paint. It has even coverage, is inexpensive and very easy to use.
This is what I ended up with.........................LOOOOVE!

As soon as the color was finished, I knew exactly where it would go. This deserved to be more than just a plant stand. I remembered seeing these round glass tops at Walmart. 
I purchased two of the glass tops for about $7 each. They were not exactly the same size as the sections in the stand but they would work. I also added Bumpers to the bottom of the glass to keep it from rubbing against the metal.
And Viola! 
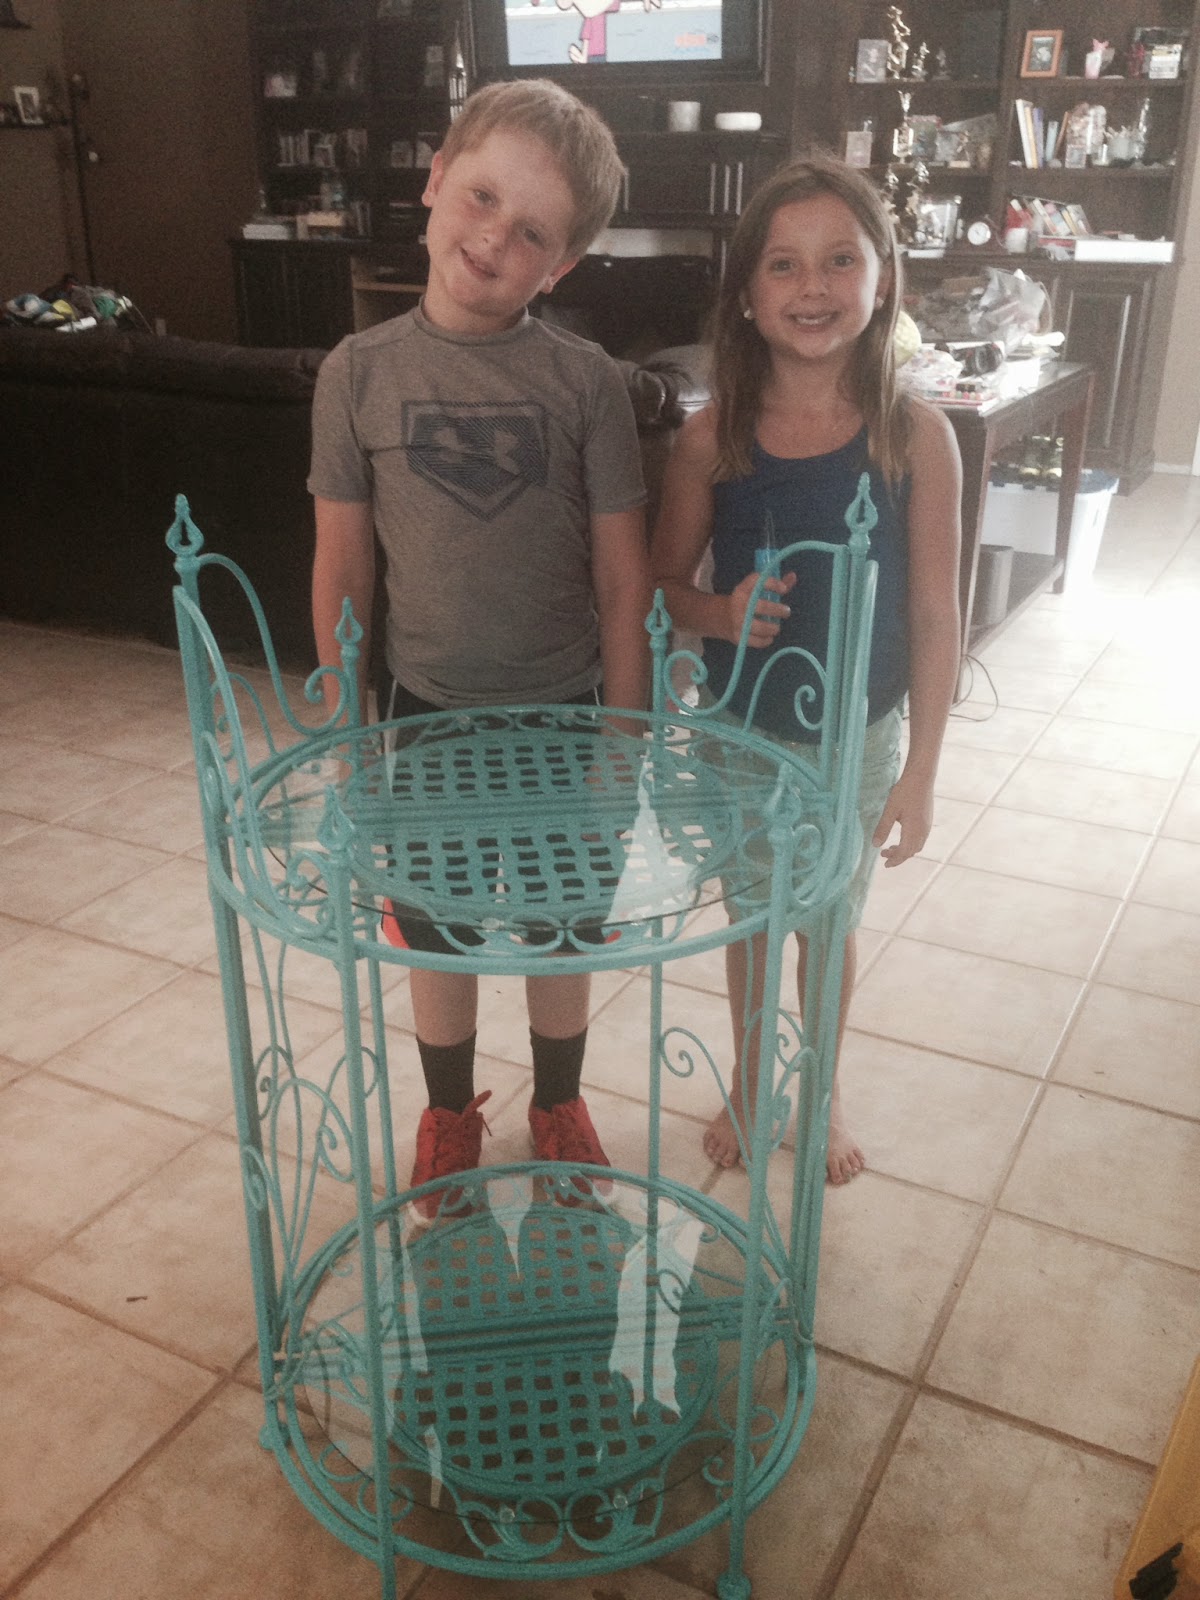
I am in the process of putting together our guest room. I have the bedding but no bed. Now I have a table. This is perfect because the colors I chose for the room are gray and turquoise. This piece will make a nice accent table. This piece is pretty big too. SEE........
These are the Twinkies standing next to it. They are seven! I hope you enjoyed this transformation. Stay tuned for more of my "Storage Score Makeovers."

Ciao for now!


Monday, July 21, 2014

MOTHER LOAD!

So....Once again I was stalking Craigslisters. Scrolling anxiously through every post until I found what I have to say is the BEST score EVER! The title read "Household Furniture." So you have to look right? Well when I opened the ad I almost fell out of my chair! The ad was for a storage unit full of furniture items. "MUST TAKE ALL" it says for $100. WHAT?

I was so afraid that I was too late but evidently The Lord knew I needed more on my plate so I got it!


There was so much more stuff than I could see on the original post. So this it what I scored:
Two twin beds (or bunk bed with ladder), three night stands, two desks, six chairs, three lamps, two book shelves, chest of drawers, lawyers book case, kitchen cart, TV stand, two wood dinner trays, metal plant stand, sports equipment organizer, oak file cabinet, 40 beanie babies in sealed packages, a rug, and various other little items.


All of the furniture is oak except the TV stand, sports equipment organizer, plant stand and one desk!
I am so excited and have so many ideas for all of these wonderful finds.

And those lovely Beanie Babies..........Well I lost control of those the minute they walked in the door.


 Thanks for looking. Stay tuned for updates on the makeovers.

Ciao for now!

Thursday, July 17, 2014

SCORE!!!!

So I was doing some Craigslist thrifting and I cam across a few items that I just had to have. I swear I can spend hours on that site. I have some ideas for these pieces. Let me know your thoughts.

I have seen this technique called "liming" on Pinterest that I have been wanting to try. HERE is one example of a table that I LOVE! I think I finally found the piece to use. Granted it isn't round but it is big and I think it will make a great first piece. I will keep my eye out for that round table. I just love that look!

I also found these AMAZING chairs. I love them and honestly the only thing I believe I'm going to do is paint the wood. I'm thinking cream and distressed. The picture does not do the color of the fabric justice, but believe me it is pretty. It is this sea foam green color and velvet. They will make a nice addition to my library.......Yes that chaos of book shelves behind them!


Let me know what you think. I'm open to suggestions! Stay tuned for the finished products.

Ciao For Now!

Kris

Wednesday, July 9, 2014

Chalk Paint........HOMEMADE!

I finally did it! After seeing countless tutorials for homemade chalk paint on Pinterest, I finally decided to take the plunge and try it for myself. I read through as many as I could stand and I finally
decided that the mixture with the calcium carbonate was the one for me. http://pinterest.com/pin/257197828691499079/

This recipe seemed to be the most economical and it does not harden like most of the other recipes I found........which to me is a waste of good paint! A little goes a long way with chalk paint.

I have to admit that I did tweak the recipe a bit. I used the following:

1 Cup paint (get wild with that color!)
3 Tbs. Calcium Citrate powder - (you can find this at any health food store and most grocers) I couldn't find the calcium carbonate so I figured this was close enough.....it works.

Water
Mainstays (Walmart brand) pint mason jars

Pour 1 (one) cup of water into a pint mason jar. Using a permanent marker, mark at the water line. Pour out the water. Pour the paint that you have chosen into the mason jar, filling to the the line. Add 3 (three) Tbsp. of the Calcium Citrate powder. Gradually add about two tablespoons of water. The paint will seem thick at first but it will this as you stir in the water. add more water if needed but only a lithe at a time. You want the paint to be about like pancake batter. Not too thick and not too thin. I used a small wooden dowel to stir my paints. This also served as a paint color sample stick for me when I was done.

I always use Sherwin Williams paint. It is a personal preference not a requirement for the recipe. I just feel that I get more for my money with the SW samples.

Enjoy your paint.

Ciao for now!

Kris

Friday, February 7, 2014

OUR WEEK DRY ERASE BOARD

Ok so it is a HI of 37 today. 37? Really? This is south Texas people! C'mon. So what does one (a Texan of course) do on a dreary, icy south Texas day???? You morph into a crafting crazy person!

I had purchased these 8 frame photo collage frames at Walmart a few months back. They were on a clearance rack for $9 so I picked up one in every color! Why not right? I could use them for something, eventually, one day....maybe! Well today was the day.


As a crafter, I have a smorgasbord of crafting supplies on hand at ALL times.  So decided to turn this lovely yellow frame into a Weekly organizer dry erase board. With three kids in three different activities, I need a place to write down all of the places we need to be so that my husband and myself can stay on track.

I had stacks of unused scrap booking paper in a drawer so I fumbled through my stack ant picked out some coordination patterns that I believed looked good with the yellow frame.

Using the pretty little piece of paper that came in the frame as my template, I proceeded to cut out one piece of patterned scrapbook paper for each section of the frame.

The next step was to place the days of the week onto each piece of paper. Days of the week (clap, clap) days of the week (clap, clap)....ok it is early cold! So...using my Cricut cutting machine with the Opposites Attract cartridge and black sticky vinyl, I cut out the names of the days of the week along with the words "Our Week".


I carefully placed the words onto the scrapbook paper being careful to note the direction of the paper within the frame so that the words would read properly. I replaces the back of the frame and viola! An "Our Week" dry erase frame! Dry erase because the glass from the frame allows you to use dry erase markers to track your week and erase when necessary! Love it! 

I have Red, Turquoise, Purple and Black. Each Frame is 4x6. Want one for yourself but don't want to make one??? Shoot me a message. I sell them for $25 each.

So what crafts do you do when you can't play outside due to the weather?

Ciao for now!

Kris


Sunday, November 3, 2013

Pumpkin Pie From A Pumpkin??? Heck Yeah!

Halloween is over, Thanksgiving is just around the corner, the mornings are getting cooler and of course Starbucks released their Pumpkin Spice Latte early! I am in the mood for a good slice of pumpkin pie.

I came across this website a few years ago while looking for a place to pick fruits for canning. http://www.pickyourown.org. While perusing through the website, I found a RECIPE for Pumpkin pie made from real pumpkins.  Really?? I always thought pumpkin pie came in an orange can, you added some other stuff, threw it all into a pie crust and viola.....Pumpkin Pie! NO WAY! This is the real deal and I will NEVER make Pumpkin Pie from a can EVER again.

So to start lets gather some ingredients.
  • 1 Pumpkin Pie Pumpkin
  • 1 C. Sugar
  • 1.5 tsp ground cinnamon
  • 1 tsp ground cloves
  • 1 tsp ground allspice
  • 1/2 tsp ground ginger
  • 1/2 tsp ground nutmeg (this is NOT in the Pick Your Own recipe but I like it)
  • 1/2 tsp kosher salt
  • 4 large eggs (fresh from the hen house at my house)
  • 1.5 cans (12 oz each) of Nestle Carnation Evaporated Milk
  • 1/2 tsp vanilla extract (I use Mexican Vanilla because I think it has a wonderful flavor)
  • 3 C. pumpkin Goop (This will be step one. Instructions to follow)
Next, I gather all of my Equipment.

This may seem like a bit of work and the canned pumpkin version may seem like it is easier but honestly it is very easy and tastes much better. OK So Lets Get Started.

Grab that pretty pie pumpkin!
Preheat your oven to 425. Cut your pumpkin in half. Remove the seeds and as much of the pumpkin strings as possible. Place the pumpkin face down into a microwave safe dish. Fill with 1-2 inches of water. Microwave on high for 12 minutes. (Microwaves vary so cooking times may vary) Also my microwave cannot accommodate both halves so I have to do them individually for a total of 24 minutes.
While the pumpkin is cooking, you can prepare your pie pan or pans. Unroll the pie crusts and place into the pan. If you are using a deep dish baker like the Pampered Chef Deep Dish Pie Plate, you will need both pie crusts.  Unroll and place one in the center of the dish. I use a knife and cut the remaining pie crust into strips and fill in around the edges.  
You want to be able to easily scrape the meat out of inside with your scoop.
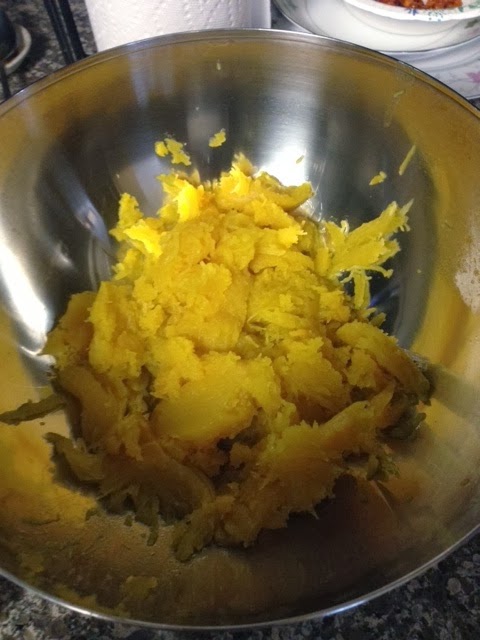
Once you have cooked both halves, scrape the meat into a mixing bowl.
It may look a little stringy but I have a solution for that. My husband bought me this handy little tool for Christmas. Cuisinart Smart Stick Hand Blender. It works like a champ......as he would say.


This is where you end up with the "Pumpkin Goop!"
Whew! That is the hardest part. It is smooth sailing from here.  Now we are ready to assemble all of those ingredients.
I like to pre-measure all of my spices so I can add them in all at once.
In a large mixing bowl, mix together all of the ingredients.  Mix well with a whisk.  
Pour into your prepared pie pan or pans.  This recipe will completely fill the Pampered Chef Deep Dish Pie Pan.

This is where the tin foil comes in. The pie will be in the oven for a while so I place tin foil around the edges of the pie to prevent it from burning. If the tin foil will not stick, you can make a tin foil tent for your pie to making sure the foil does not touch the pie filling. 

**TRICK Place a baking sheet on the oven rack and place the pie shell on the baking sheet before filling. This way you can fill the shell place the foil tent and close the oven without having to worry about walking with the filled shell and spilling on the edges like I did.
Bake at 425 for 15 minutes then reduce the temperature to 350 and continue to cook. Again cooking times will vary. I ended up cooking my pie for 1.5 hours at 350. Check your pie every 30 minutes to test for doneness. I use the toothpick method.

You can add some cute fall cutouts the last 15 minutes of cooking. I used my Pampered Chef Fall
Cutter set. They do not sell these any longer, however you can use any cookie cutters you have or use your imagination and create your own designs.
This truly is the best pumpkin pie I have ever had. It doesn't last long in our house. No Whipped cream required! Try it Im sure you will agree.

**Any extra Pumpkin Goop you have can be frozen and used to make another pie or can be used to make a pumpkin shake. YUM!

Ciao for now

Kris

Tuesday, September 3, 2013

LOOK WHAT I FOUND!


I though omy "Cyber Friend"  Serena at Thrift Diving www.ThriftDiving.com when I found it. Don't ask me why. Maybe because she is so thrifty and I got this out from behind a dumpster!!!!!!


It is solid metal. Weighs  about 50 pounds. It is missing one drawer but for some reason I had to have it. It is rusty....not sure what to do about that. But the drawers open fine. Not sure how old it is but it is OLD! And hey how could I go wrong with FREE?

So do you have any ideas?

The bottom is rough so I was thinking of adding a base somehow and maybe some casters???? How to do that on metal.....I don't know but I'm hoping ill figure something out. Wheels would make it 
much easier to move around. I've also got to figure out something for that missing drawer. I'm thinking of removing the one on the opposite end for symmetry? The drawers are almost like magazine boxes in shape when opened. Not sure what I will use it for but man I am excited!! 

I would LOVE your input.

Ciao for now

Kris
Sent from Kris's iPad

Thursday, August 1, 2013

Wines By Wives -Tamra Collection

OK........so I have been wanting to join a monthly wine club. I have been watching The Real Housewives of Orange County. I saw that Tamra and Vicki (Icky Bitchy Vicki) have started a Wine By Wives Club. So I joined. (On Tamra's side of course) http://www.winesbywives.com/

It has been three months so I have six bottles now. I opened my first bottle tonight after a long day of assembling furniture for our new school. This one was Dancing Coyote Alborino 2010.  It was refreshing and crisp. A great treat after a hard day of work in 101' heat. It reminded me of a Chardonnay and Pinot Grigio mixed. Not dry ...... Not sweet. Seemed just right. This seems like a great wine to make a good summer sangria. A great ending to a productive day.


Ciao for now

Kris

Friday, April 12, 2013

Wednesday, February 13, 2013

Ear Ache Releif

OK so my son (10 year old) was complaining of an earache. He NEVER complains about stuff like that. But he was in tears so knew it was serious. Tried Tylenol. 45 minutes later he was still crying. So I broke out one of the best books EVER! Every Woman's Guide To Natural Home Remedies.
I mixed together a teaspoon of crushed garlic, teaspoon of lemon juice and two tablespoons of olive oil. Heated it in the microwave for 15 seconds (microwave times may vary). Then dropped three drops of the solution into my son's ear and plugged it with cotton.
The next morning, I asked my son how his ear was and he said it felt much better. Just to be safe, I called our pediatrician to make an appointment because it is unlike our son to complain of ear pain and cry. We were seen that afternoon.  During the examination, my son explained o the DR that the pain was horrible the night before, but since I put the drops in, it was better. The DR asked what I had put in is ear and I told her. Se was NOT pleased. She told me DO NOT PUT THING LIKE THAT IN HIS EAR!  (Hello.....he stopped hurting after I did, it is all natural.....so I did it! And guess what....IT WORKED!)
So fast forward three weeks and guess what.....I was coughing all night long and I woke up with a sore throat and an ear ache! So to prove to my kids that I would not do to them something that I would not do to myself.....I put a mixture of olive oil, garlic and lemon in my ear. (Which by the way I have made a batch and keep in a jar in the fridge).......and guess what?  YES it works! After about 20 minutes my ear felt better. So ........my theory is GOD gave us these natural things for a reason. Use them.

Tuesday, December 11, 2012

Safe E-mail for Kids!

KidsEmail.org is a safe email service for kids and families. Your kids can now have a safe email account while allowing parents to be aware of any correspondence their children send and receive. You supervise your children when they go outside to play. Do you know who is contacting your child inside of your home? Let us help you keep your kids safe online! Safe Email for Kids? We've got you covered! Get a Free 60 Day Trial Now! This is for US Family Guide users ONLY! @kidsemail Use promo code: US Family when registering. www.kidsemail.org